
 ShadowstrixHybridRecently Updated
Shadowstrix - Damage Pvp
This is a PvP-focused build with some survivability for diving into the action against other players.
Item Set Import Codes
Skills
Dagger
Basic
 Shadow Wheel Slash
A three-stage attack technique that can be used three times, dealing Physical Damage. After each stage of Shadow Wheel Slash, press the button to perform a branch attack. There is a limited time window for combos between each stage. If the window expires, the stage count resets. Branch attacks recover Energy.
 Sneak
SneakCrush crow feather dust to enter Stealth for a period.
Selected Skills
 Flash Stride
Dash forward a certain distance, dealing Physical Damage to enemies in the path. Flash Stride has a shorter base cooldown in trio mode.
 Shadow Strike
Leave a shadow in place and dash forward, dealing Physical Damage. After a brief delay, the shadow dashes toward your position, dealing Physical Damage and stunning enemy targets it hits.
Dual Blades
Basic
 Pursuit Strike
Perform a short forward dash and deal multiple hits of Physical Damage.
 Flurry Strike
After launching a Light Strike, press the button to move backward, then dash forward to deal Physical Damage. Hold to perform a Lv.1 charge. Lv.1 Charge: Increases Damage Multiplier and dash distance.
 Bloody Blade Dance
Hold the buttons to channel Blade Dance, continuously attacking forward and dealing Physical Damage to enemies hit. This skill deals increased damage to Gyldhunters.
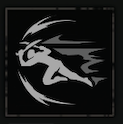 Fang Rush
Shortly after using a skill, press the button to dash forward and deal Physical Damage. After using Fang Rush, dodge energy will not recover for a certain period.
Selected Skills
 Spinning Slash
Spin and dash forward with a powerful strike, dealing Physical Damage. Spinning Slash has a shorter base cooldown in trio mode.
 Crow Storm
Hold to aim, then throw a black crow toward the target area, unleashing a Crow Storm upon arrival. During Crow Storm, enemies continuously take Physical Damage.
Talents
Affixes
Aegis
Increase Defense. Upon reaching a certain level, increase Physical Resistance.
Lv.1 Defense +15.
Lv.2 Defense +30.
Lv.3 Defense +45.
Lv.4 Defense +60.
Lv.5 Defense +75. Physical Resistance +2.5%.
Lv.6 Defense +90. Physical Resistance +2.5%.
Lv.7 Defense +105. Physical Resistance +2.5%.
Stoic
When Health is below 50%, increase Physical Resistance and Magic Resistance. Upon reaching a certain level, when Health is below 30%, restore Health. Cooldown: 120s.
Lv.1 Physical Resistance +1.1%. Magic Resistance +1.1%.
Lv.2 Physical Resistance +2.2%. Magic Resistance +2.2%.
Lv.3 Physical Resistance +3.3%. Magic Resistance +3.3%.
Lv.4 Physical Resistance +4.4%. Magic Resistance +4.4%.
Lv.5 Physical Resistance +5.5%. Magic Resistance +5.5%. Restores 15% Health.
Lv.6 Physical Resistance +6.6%. Magic Resistance +6.6%. Restores 15% Health.
Lv.7 Physical Resistance +7.7%. Magic Resistance +7.7%. Restores 15% Health.
Valor
Increases Attack. Upon reaching a certain level, also increases Defense Penetration.
Lv.1 Attack +1.5%.
Lv.2 Attack +3%.
Lv.3 Attack +4.5%.
Lv.4 Attack +6%.
Lv.5 Attack +7.5%. Defense Penetration +1.8%.
Lv.6 Attack +9%. Defense Penetration +1.8%.
Lv.7 Attack +10.5%. Defense Penetration +1.8%.
Fervor
After hitting an enemy, increase Physical Damage and Magic Damage for 3s, stacking up to 5 times. Upon reaching the required level, when the number of stacks is greater than or equal to 3, increase Defense Penetration.
Lv.1 Physical Damage +0.4%. Magic Damage +0.4%.
Lv.2 Physical Damage +0.8%. Magic Damage +0.8%.
Lv.3 Physical Damage +1.2%. Magic Damage +1.2%.
Lv.4 Physical Damage +1.6%. Magic Damage +1.6%.
Lv.5 Physical Damage +2%. Magic Damage +2%. Defense Penetration +2.5%.
Lv.6 Physical Damage +2.4%. Magic Damage +2.4%. Defense Penetration +2.5%.
Lv.7 Physical Damage +2.8%. Magic Damage +2.8%. Defense Penetration +2.5%.
Strife
Increases Melee Weapon Damage. Upon reaching a certain level, increases Melee Weapon Damage for each nearby enemy, up to 3 stacks.
Lv.1 Physical Damage +1.2%. Magic Damage +1.2%.
Lv.2 Physical Damage +2.4%. Magic Damage +2.4%.
Lv.3 Physical Damage +3.6%. Magic Damage +3.6%.
Lv.4 Physical Damage +4.8%. Magic Damage +4.8%.
Lv.5 Physical Damage +6%. Magic Damage +6%. Physical Damage per stack +2%. Magic Damage per stack +2%.
Lv.6 Physical Damage +7.2%. Magic Damage +7.2%. Physical Damage per stack +2%. Magic Damage per stack +2%.
Lv.7 Physical Damage +8.4%. Magic Damage +8.4%. Physical Damage per stack +2%. Magic Damage per stack +2%.
Vitality
Increases Maximum Energy. Upon reaching a certain level, when entering a state of Energy Overdraft, you become immune to that specific instance of Energy Overdraft. Cooldown: 60s.
Lv.1 Maximum Energy +5.
Lv.2 Maximum Energy +10.
Lv.3 Maximum Energy +15.
Lv.4 Maximum Energy +20. Immune to the current Energy Overdraft state.
Lv.5 Maximum Energy +25. Immune to the current Energy Overdraft state.
Guide
# Shadowstrixx — Crow Dive Assassin
This build is focused on diving vulnerable enemies after landing a stun with Crow Storm, using Spinning Slash to deal damage and maintain pressure during the fight.
Your Daggers provide the mobility needed to chase targets, reposition and escape, while your Dual Blades give you the tools to punish enemies once you've committed to the fight.
Shadowstrixx isn't a frontline fighter. You're an assassin who looks for an opening, dives onto a vulnerable target, bursts them down and gets out before the enemy team can punish you.
Core Gameplan
Your basic gameplan is:
Find a target → Land Crow Storm → Dive → Spinning Slash → Burst → Chase or Disengage
The important part of this build is understanding the role of each ability.
Crow Storm creates the opportunity by stunning the enemy.
Spinning Slash is primarily a combat and damage ability. Its dash can also be used to enter or leave a fight when the situation calls for it, but it should not be treated as your main engage or disengage tool.
Shadow Strike and Flash Stride are your main mobility tools for pursuing enemies and escaping dangerous situations.
Crow Storm — Create the Opening
Crow Storm is the core of the build.
Look for enemies who are:
* Separated from their team
* Fighting another player
* Low on health
* Out of important cooldowns
* Trying to heal or loot
* Forced into predictable movement
With Enhanced Crow Storm, the increased speed and range make it easier to land your crows from a safer distance.
Once the target is stunned, that's your signal to dive.
Don't give them time to recover.
Spinning Slash — Your Main Combat Tool
Spinning Slash is primarily used during the fight.
Its main purpose is to deal heavy Physical Damage and maintain pressure once you've committed to your target.
Use it to:
* Continue your burst
* Deal heavy damage during close-range combat
* Maintain pressure on your target
* Take advantage of Bloodthirsty Frenzy
* Benefit from the Physical Damage increase provided by After Effect
However, the dash makes Spinning Slash more versatile than simply being a damage ability.
Spinning Slash can also be used to enter or leave a fight.
If you need to quickly close the last bit of distance after your target is stunned, Spinning Slash can help you get into the fight.
Likewise, if the fight suddenly becomes unfavorable, you can use its movement to create distance and get out.
But this should be situational, not the default use of the ability.
Think of it like this:
Primary use: Damage and pressure during combat.
Secondary use: Enter or leave combat when the opportunity requires it.
You generally don't want to waste Spinning Slash purely as an escape at the beginning of a fight, because you're giving up one of your strongest damage tools.
Thanks to Unstoppable, Spinning Slash also provides Super Armor while casting, making it more reliable when you're already fighting and the enemy is trying to interrupt you.
Dagger Mobility — Chase and Escape
Your Daggers have a more specialized role.
Flash Stride and Shadow Strike are your primary pursuit and escape tools.
Try to keep at least one available whenever possible.
If you use both immediately to enter a fight, you may have no mobility left when the enemy receives backup or escapes your initial burst.
Shadow Strike
Shadow Strike is mainly used to pursue or escape.
Use it to:
* Catch fleeing players
* Close a gap after an enemy escapes
* Reposition during combat
* Escape from a dangerous fight
* Create distance from the enemy team
It can be used to engage when necessary, but if you've already landed Crow Storm, you don't always need to spend it just to enter the fight.
Flash Stride
Flash Stride is your flexible mobility tool for pursuit and escape.
Use it to:
* Chase fleeing enemies
* Dodge dangerous attacks
* Reposition
* Follow a target around obstacles
* Escape after securing a kill
* Disengage when the enemy team collapses on you
The key is resource management.
Don't spend every mobility ability just to reach your target.
You want to have an escape available after the dive.
Ideal Dive
Your preferred situation looks like:
Crow Storm → Stun → Enter the fight → Spinning Slash → Burst → Continue attacking → Shadow Strike / Flash Stride to chase or escape
There isn't one mandatory combo.
The important thing is understanding the purpose of each ability.
For example:
Crow Storm → Stun → Spinning Slash into the target → Burst → Enemy runs → Shadow Strike / Flash Stride → Continue the chase
Or:
Crow Storm → Stun → Dive → Spinning Slash → Enemy team arrives → Flash Stride / Shadow Strike → Disengage
And if the situation requires it:
Crow Storm → Stun → Spinning Slash to enter → Burst → Spinning Slash to create distance
The ability is flexible enough to serve both purposes, but its main value is still the damage it provides during combat.
Don't Waste Your Mobility
One of the biggest mistakes with this build is using every movement ability immediately.
You land Crow Storm.
The enemy is stunned.
You have the perfect opportunity.
You use Shadow Strike.
Then Flash Stride.
Then Spinning Slash.
The enemy survives.
Now the enemy team arrives.
You have no mobility.
You're dead.
Instead, try to maintain at least one movement option whenever possible.
Your goal is to have enough mobility to make the decision:
Can I finish this player, or should I disengage?
That decision is what makes Shadowstrixx so difficult to punish.
Target Priority
Don't dive the first player you see.
Look for vulnerable targets who can be eliminated before their team reacts.
Priority Targets
Seer → Sorcerer → Blackarrow
These classes can be extremely vulnerable when caught away from their team.
Your goal isn't necessarily to start the biggest fight.
Your goal is to find the player who is easiest to isolate and eliminate.
Track Enemy Cooldowns
Before committing, pay attention to the enemy's defensive and mobility abilities.
If they still have every escape available, consider waiting.
If they just used their mobility?
That's your opportunity.
Crow Storm becomes much more dangerous when the enemy has fewer options to escape your dive.
When to Disengage
Shadowstrixx is extremely vulnerable when surrounded.
If you dive a target and suddenly see multiple enemies arriving, don't tunnel vision the kill.
You have several options:
Spinning Slash can create distance if the situation allows it.
Flash Stride can reposition you quickly.
Shadow Strike can also be used to escape and create separation.
Your priority should be surviving the bad fight rather than forcing a kill.
A successful assassin knows when the opportunity is over.
Get out, reset, and look for another Crow Storm.
Trios
Shadowstrixx works particularly well in Trios because your teammates can create the openings you need.
Let your teammates create pressure while you look for an isolated target.
A strong sequence is:
Team creates pressure → Enemy formation breaks → Crow Storm → Stun → Dive → Spinning Slash → Burst → Chase or Disengage
Tankier classes such as Mercenary or Withered Knight can draw attention while you attack from another angle.
You don't have to be the first player into the fight.
Let your team create the chaos. You punish it.
Strengths
→ Extremely high burst and DPS potential
→ Excellent mobility
→ Crow Storm provides a powerful setup for dives
→ Spinning Slash deals heavy damage while providing flexible movement
→ Strong pursuit and escape tools
→ Excellent at isolating vulnerable targets
→ Can quickly transition between PvE and PvP
→ Strong map mobility
→ Excellent at punishing separated players
→ Very effective in Trios
Weaknesses
→ Very low survivability
→ Mistakes are heavily punished
→ Vulnerable when surrounded
→ Long cooldowns make failed engagements costly
→ Requires good timing and positioning
→ Difficult to play consistently
→ Wasting your mobility can leave you without an escape
→ Struggles against enemies that can stay on top of you
→ Withered Knight can parry and punish many of your attacks
TL;DR
Find a vulnerable target.
Land Crow Storm.
When they are stunned, dive immediately.
Use Spinning Slash primarily during combat to deal damage and maintain pressure.
Use its dash to enter or leave the fight when necessary, but don't treat it as your primary engage or disengage tool.
Use Shadow Strike and Flash Stride primarily to chase enemies or escape.
Your ideal gameplan is:
Crow Storm → Stun → Dive → Spinning Slash → Burst → Chase OR Disengage → Reset → Repeat
The biggest mistake is playing Shadowstrixx like a frontline fighter.
You aren't the tank. You're the assassin.
Pick your target, create the opening, explode onto them, and disappear before the enemy has time to punish you.
If this guide helped you out, feel free to stop by my Twitch and say hi!
I regularly play Mistfall Hunter live, test different builds, and probably make a few questionable decisions along the way.
Twitch: https://www.twitch.tv/torresrubio
Comments (0)
Got thoughts on this build?
Sign in to join the conversation.
No comments yet. Be the first to share your thoughts!

Contents